Tuesday 29 March 2016

EPISODE EIGHT Part2 - DENGAR DOMINATION

Hi everyone. This week  really enjoyed seeing people take hold of the new toys in wave 8 and loved exploring them myself. Here's a reminder of what I was flying.


GAME ONE.
In game one i came up against a lothal rebel and the outrider. Knowing the pure damage output of my list i decided to take advantage of the Ghosts 0 agility and focus on killing it first. I placed the asteroids in a line down the far side of the table, giving me a nice jousting lane. My opponent set up on the opposite side of the lane. My ships surged forwards while Dengar barrel rolled in behind the Y-wings.
The Y-wings moved into prime firing position and the enemy ships approached. the outrider bumped right into both of my Y-wings and the ghost moved along side. Dengar moved up behind the melee and barrel rolled into range 1 of Dash Rendar's Heavy Laser Cannon. The full might of my squadron fired upon the ghost, Dealing a total 12 damage in a  single turn. The ghost fired back and managed to strip the shields off of a Y-wing. Trying to reset the situation both the outrider and Ghost K-turned to fire upon my Y-wings. But the Y-wings also K-turned getting out of range. Meanwhile Dengar utilised that amazing green hard 1 turn, and barrel rolled right along side the Outrider. The only ship able to shoot was dengar, and with a little help from his Agromechs he managed to finish of the ghost. The Y-wings headed back into the fray. Both of them getting Dash in their sights. Dash moved upto relieve his stress and Dengar once again span around and rolled into range 1. A round of shooting later and there was no more Outrider. A decisive victory for Scum and Villainy.


GAME TWO.
In game two i came up against an eerily familiar foe. Dash and the Ghost. But this time the Ghost was being piloted by chopper, and was built for bulk with both the Reinforced Deflectors and Chewbacca crew fixing up its damage. I set up in the exact same way as last time with the asteroids down the flank, and with hopes to joust the ghost. Once again Dengar barrel rolled in behind the Y-wings. The Outrider took more of a flanking position between  my squad and the asteroid line. My Y-wings moved forwards and set up there shots. Then my opponent did a great move. That went very wrong. He revealed a 5 K-turn. With the intention of overlapping my Y-wings and not finishing the rotation. This would have made him unable to be shot at by either Y-wing and leaving him free to fire on Dengar. A great idea. But the K-turn didn't quite overlap and the ghost stood right in front of my fleet with no way of defending itself. I guess that's what you get when you let chopper fly. Blasters began to blaze. The Outrider took three shields off of a Y-wing and then they let loose on the Ghost. Even with the Ghosts Reinforced Deflectors i managed to push 12 damage through in a single round. But now i had a new problem. The giant space whale that is the ghost was right in front of my Y-wings and i needed to make a decision. Go 1 forwards and bump into it, leaving me vulnerable this turn but free to chase it in the next. Or fly over it and hope it doesn't bump me leaving me free to K-turn next round. I opted to fly over it and hope. The ghost preformed a 3 turn, re leaving its stress with the help of kanan, aboard the outrider. One of my Y-wings had a shot at least. Dash moved in to block off Dengar. And with some great barrel rolling managed to do so. Still the Y-wing blasted away the ghost and Dengar took the long range shots. One round later the ghost was gone. No it was my entire fleet against Dash, who was unscathed. My Y-wings Struggled to keep up with the Outrider and one of them was destroyed. Meanwhile Dengar skirted around a central asteroid, using barrel roll to keep the Outrider in range. My second Y-wing made its approach slowly, while Dengar funneled Dash into the far corner. When the time was right my Y-wing swept on in and Dengar burst in from behind. Dengar put the outrider onto 1 hull. The outrider fired back at dengar taking him below half health then Dengar managed to finish off the outrider with his revenge shot. Another victory to the Scum.


GAME THREE.
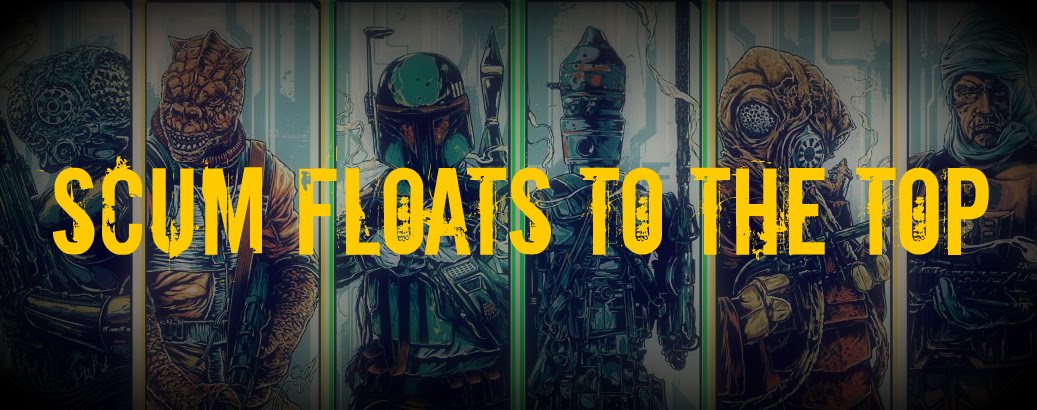
In game three i faced Boba and Kath. My biggest fear when facing them was that they both had a tactician crew. if they could stack stress onto one of my ships then no Agromech shenanigans for me.
I Set up an asteroid line on the left flank and deployed my ships in the centre as i didn't know where my enemy would deploy. Boba took the left flank and kath the right. My ships instantly took a hard turn to the left. I planned to rush down Boba before kath could catch up. My squad arked around the asteroid field laying shot after shot into Boba. Boba managed little damage back, having to fire at long
range through asteroids. Kath saw what was happening and banked her way into the fray. But it was already largely over for Boba. Dengar K-turned to re position and better chase boba. And Boba K-turned so he could bring his Heavy Laser Cannon to bear onto the Jumpmaster. Luckily both were out of range. Meanwhile the Y-wings lined up on Kath. Dealing 6 damage in a single exchange. My Y-wings them moved to block the firespray but they had other ideas Boba flew right over one Y-wing headed for Dengar, and Kath did the same. Boba's cannon managed to put Dengar onto half health and then Dengars revenge shot managed to end the firespray. Still having not fired, Dengar turned his turrets onto Kath and took her to 2 hull. Kath couldn't resist a Y-wing at range 1 in rear ark and threw 5 attack dice. The Y-wing took 4 damage. Then the Dorsal turrets began to blaze, the Agromechs began to calculate and before long Kath was no more. Victory to Scum.


THE REVIEW.
let me start by saying I LOVE THIS LIST!! I honestly don't think I would change a single thing. The Dorsal Y-wings were so punishing with the agromech making them really reliable. I don't think a Y-wing ever attacked and didn't cause damage. I much prefer this Y-wing build to the Autoblaster turret varient i took last week. For only 23 points, the Dorsal Y-wing is something i would seriously consider when building a scum list. It really does prove that Twin Laser Turrets aren't the only option. Dengar Preformed amazingly also. He does seem a little flimsy when Jousting so knowing when to try and fly over your targets and not worry about his ability might be useful. Push the Limit was an upgrade i
wasn't 100% sure on, but i ended up using barrel roll a lot. The ability to use the barrel roll and still have focus was a big reason i loved flying the jumpmaster. If you are going to take PTL on Dengar i'd suggest really planning out where your going to be moving in the next few turns as you want to stick to the left hand side of his dial. That white Sloop may seem tempting, but in order to come back the way you came you are on the right (and there for wrong) side of your dial. This list does rely heavily on being able to take focus. Against an enemy who can stack stress it may be in some trouble. That said when i flew against the dual firespray I managed to always be at range 1 or 3 so the tactician never mattered. Against a Stress hog i could see this having a little trouble, but the Dorsal Y-wings could easily kill it in a single round of shooting if they can get into range 1.


With the league coming to a close, im sad to say i won't be able to attend the final due to other commitments (DAMN YOU REALITY!) next week im going to be breaking the format and give a general review of scum in wave 8 now that people have had some time to digest there ideas. Over the last 8 weeks this blog has manged to get over 10,000 views. This number astonishing and I never could have imagined the blog would be so well received. Thank you all for your time and i hope you have enjoyed the experience. Id also like to give a shout out to Netherworld. The local store where this league has been held. Its hard for a small store to justify the costs of running a league and im very glad that they have and hope for more X-wing events to come. Please go check out there store if your ever around the north west. and ill levee a link to there Facebook page Here. For more pictures of my work or to contact me for commissions, a link to my Facebook group is in the sidebar. Thanks for reading and until next time.

Goodbye and Fly Casual.

Wednesday 23 March 2016

EPISODE EIGHT - DOUBLE TAP DENGAR

Hi everyone. With wave 8 released, there  are plenty of new shiny builds or the scum faction. Today we look at a build focused around Dengar and the Jumpmaster 5000. Hear's the list.


Dengar
When I first saw the Jumpmaster, I really wasn't overwhelmed with ideas for bad ass builds. 12 points for a title! And with its asymmetrical dial  feared that this ship was going to be a gimmick that you would buy for the upgrade cards alone. I'm glad to say that I was wrong. The 12 point title is still expensive, but when you consider how cheap the base cost of the jumpmaster, this price is justifiable. The price for the title is comparable to the outrider title and the cannon you need to take along side it. The build i'm using for Dengar in this list comes to 53 points, which again is very similar to most Dash Rendar builds. The Strength of the Jumpmaster seems to be in its upgrade slots. Most notably the Astromech. Every ship in this build has an R4 Agromech. Previously  had only seen the Agromech as a tool to use with blaster turrets. It is more powerful than i could possibly have imagined. The Agromech allows you to gain a target lock when you spend a focus. Now at face value this doesn't seem great. Until it dawned on me that the target lock can be used immediately.  So i attack roll 2 blanks and an eye. crappy roll. i spend my focus to make the eye into 1 hit. i then get a target lock and can instantly re-roll the other 2 dice. This gives Dengars shots incredible accuracy. As a side note.

You can spend a focus token even if there are no eye results to modify. If you wiff and roll all blanks, spend that focus, get a target lock and try again. Its true that on the Re-rolls you normally wont have focus to modify the attack but its still a 50% chance to turn a miss into a hit or crit each time. And this bring me on to the Recon Specialist. Recon Specialist has several roles in this build. With two focus dengar has the following option. 1. Use the focus to activate the Agromech on both of his attacks. 2. if not under attack. use the first token to activate the Agromech and the second to modify those dice results and regain a target lock for next turn. 3 have two focus for defense. This can allow Dengar to choose to b evasive or aggressive each combat phase. The final upgrade i took was Push the Limit. An odd choice as with the Agromech i essentially already have focus and a target lock. Ptl will allow me to barrel roll and get whoever i want to double tap into ark and then focus with the recon specialist. All said this Dengar build can dish out a ton of reliable damage.


Dorsal WingI know i'v been on a bit of a Y-wing binge recently but they have really impressed me in my previous games. Now with Wave 8 out, I wanted to take a look at one card in particular. The Dorsal Turret. Dorsal Turret comes in the Ghost and is a 2 attack turret at range 1-2. however it becomes 3 attack at range 1 like a primary weapon. On a Y-wing with Btl-a4 the dorsal turret basically becomes. At range 1-2 attack twice. Combine this with the Agromech and you have one scary jouster. The Y-wing zooms into range 1, Focuses and gets ready to engage. You fire your primary weapon of 3 attack dice.You use the Agromech to modify your dice and to gain a target lock. Then you fire the dorsal turret. 3 more attack dice, now with a target lock and your opponent has likely already spent its tokens. Against agility 1-2 ships the Dorsal Y-wings are going to be a real threat. And if my opponent is shooting at the Y-wings there not shooting at Dengar.


SYNERGY
The intention of this list is to get up into the enemy's face and have a good old fashioned joust. Each of my ships can attack twice a turn when facing an enemy head on and have enough bulk to take the receiving fire. Then you 4-K turn and repeat. The Y-wings will fly together as a unit with Dengar on the left flank. The ships in this list have a surprisingly similar dial with the exception of the jumpmasters sloops. Dengar's asymmetrical dial isn't much of an issue as he will be going forwards most of the time to relieve stress and then he has a 4-K turn to stay with the Y-wings. This list may struggle against high agility ark dodgers but with Dengars pilot skill 9 and 360 primary weapon, I can keep pouring hits into them and just wait for those bad evade rolls. Im interested in seeing how this list fares and more interested in seeing Dengar do his thing.

Next week is the final week of the league and sadly, I may be unable to attend. Even if i'm unable to post a list and a batrep next week, I will be giving a review of the wave 8 releases for scum and looking at some fun ways the new toys can be used. My commissions page is in the sidebar for those interested. Thanks for reading, until next time.

Goodbye and Fly Casual.


Monday 21 March 2016

EPISODE SEVEN Part2 - A PERFECT DRAW


Hi everyone. Sadly this week i only managed to get two games in due to an odd number of players but they were very interesting games. Here's a reminder of what i was flying.


GAME ONE.

In game one my Y-wings came up against Darth Vader, Zertik Strom and Colonel Jendon. I placed the majority of the asteroids on the rights flank hoping to draw the TIE advanced in and let my turrets take care of. them in the crossfire. However, my enemy didn't fall for the trap, and both the TIE Advanced moved directly to engage my Btla Y-wing. With an unexpected surge forwards my Btla managed to block Zertik and caused Vader to bump right behind. Sadly, even with my primary shots and autoblaster turret i only managed to punch through one damage onto Vader. Leaving the TIE's behind my Btla went full steam ahead and locked onto the lambda. By now the rest of my fleet had managed to curl around the asteroids and were mounting a mass flank attack. Once i had my full force in position to fire, the enemy didn't last long. The Lambda was focused by the Y-wings with the Agromechs guiding the blaster turrets shots, the shuttle lost 6 hits in a single round. One turn later the Lambda was finished off by Kavil, But Vader sought revenge and managed to kill my Btla Y-wing. The Y-wings began to circle the TIE advanced. Vader couldn't turn enough to get the Y-wings into ark, and with a hail of laser fire Vader was destroyed. Surrounded and having seen his allies destroyed, Zertik decides to cut his losses and flees. Victory to the Scum and Villainy.


GAME TWO.

In game two ill admit i was a little afraid. I was against the dual IG88 Brobots. I knew in this match up I would have to be more aggressive and try to circle the IG as best i could. I sent my Btla Y-wing right for the Brobots while the others moved to flank them. Once again the Btla managed to block my
opponent, stopping them from getting into position or taking actions. By the time the IG got managed to engage, the Y-wing had them completely surrounded. With all of my Y-wings focusing on one Ig at  time it wasn't long before I managed to kill one. The other i managed to keep blocking using one Y-wing or another and eventually forced it to preform segnors loop. This allowed my ships to know almost exactly where the IG would be next turn. My ships
got into position and kavil managed to blast it out of the sky. Victory to the Scum! (with not a single casualty!)


THE REVIEW

This list worked great. So much maneuverability and  pure bulk the Y-Wings preformed great.

TLT - The Twin Laser Turret Y-wing preformed great in this list. It spent most of its time flying along side the Blaster Turret Y-wings. This made the Tlt a constant issue that was hard to deal with, as getting in range one of the Tlt meant being in range one of the Blaster Turrets.

BLASTER TURRET - The Blaster Turret - Agromech combination showed its strength again. They caused the majority of the damage and fired very reliably every turn. Even against fast and agile ships like the IG88 and Vader they were great.

BTL-A4 - The Btla Y-wing seemed to fit the role of blocking my opponents very well tho it rarely did much damage. I think were i to fly this list again i would either swap out the Btla for a Khiraxz fighter or replace the AutoBlaster turret with a dorsal turret. The Dorsal Turret is only 1 point more and would allow the Btla essentially fire its primary weapon twice at range 1-2. Yes you don't have the automatic hits of the Autoblaster turret but you are likely to attack more often with your turret and at range one ou have an extra attack die.


Amazingly, this weeks games at the league ended in a perfect draw. With both me and my friend jack having the exact same Win-Loss ratio, The exact same MOV and as far as we can tell the same SOS. In the end we just rolled off for it and called jack the winner, but I think Y-wings were the real winner today.

Sadly i was unable to show off wave 8 on the day of release, as my new ships didn't arrive until the day after. However Next week we will be diving into a Wave 8 list as well as a special post taking a look at what wave 8 brings to Scum and Villainy. As always my commissions page is in the side bar my paintbrush is ready for all of our wave 8 needs. Thanks for reading and until next time.

Goodbye and Fly Casual

Wednesday 16 March 2016

EPISODE SEVEN - Y Oh Y


Hi everyone. Last week I really enjoyed flying the y-wings, so this time iv decided to take a closer look at the ship and the different roles it can take in a scum squadron. As a break from tradition lets not look at what i'm flying this week and instead look at some of the different builds scum Y-wings can take.


Masta Blasta
In this list we focus on a Y-wing with a Blaster Turret and the R4 Agromech. So what are the strengths and weaknesses of this build?

Movement: This Y-wings movements are limited and will be often using the 2 maneuvers on the dial. Because of the Agromech we are unable to take the Unhinged Astromech and have those great hard 3 turns as green. This build struggles to relieve stress a a lot having to use its 1-2 forwards to do so.

Offence: This is the y-wing build with the most potential damage, and its attacks are very reliable.
With 3 attack dice at 360 the Blaster turret is a formidable weapon. The R4 Agromech makes this all the stronger making sure you have a target lock every single time you fire the turret. The weakness of this is that the turret requires you have a focus to fire. Should your ship be unable to take action your turret is useless. You can get around this by taking a lower Pilot Skill y-wing and make sure none can move to bump you before you get that focus. As i said before, this ship struggles with re leaving stress. If you come up against an opponent who can stack stress onto your ship the chances are you won't be able to fire the blaster turret at all.

Defense: The best defensive tactic with this build is just to get into a position where your opponent can't shoot you. try to fly behind them and then stay at range 1-2. Use hard turns as opposed to K-turns as this will allow you to still fire the Blaster Turret while turning around. This list also has a spare 4 points to load up on bombs. The Ion bomb can make people more predictable so that your y-wings can get into position without enemy retribution. The seismic charge is just great for getting an auto hit on foes with auto thrusters.


BTL Auto
In this list the Y-wing forgoes its ability to shoot 360 and focuses on the shear weight of shots they can throw out. With the BTL-A4 title and an auto blaster turret Y-wings can become very deadly.

Movement: This build is just as restricted as the blaster turret on in terms of movement, as it has no astromechs at all. However the lack of  mobility is a little more apparent in this list as the BTL-A4 title makes it so the ship can only fire in its front ark.

Offence: Offensively this build can be extremely high damage but really relies on getting into range one. once in range one the ship can use its primary attack of 3 dice and then a 2 attack dice with its Autoblaster turret. That's 5 attack dice in a turn, and the turrets hits can't be evaded. The downside of this is that out of range one you only have 2 attack dice. If your opponent has the ability to barrel roll or boost it wont be too difficult for them to stay out of range one. This list has a lot of potential but i feel it will take a lot more skill to fly.

Defense: This list doesn't have any defensive tricks other than its incredible amount of hull. 40 hull spread over 5 ships is very hard to take down, especially when you consider each ship is only giving up 20 points to your opponent upon death. Just make sure you can cause solid damage before your ships begin to go down.


TLT Spam
If you play this list your a bad person. But seriously. Twin Laser Turret really has changed the shape of the game. almost every new competitive list iv seen seems to incorporate the TLT in some way. Scum Y-wings are the apotheosis of TLT ships. With the Unhinged Astromech allowing the Y-wings to move more unpredictably, several of these things really can be an instant win against certain lists.

Movement: With the Unhinged Astromech the Y-wing counts all of its 3 maneuvers as green. This takes the ships hard 3 turns from red to green. The fact that its green doesn't make too much of a difference, but being able to repeatedly do a wide hard turn with a ship that never want to be at range one is very good. it forces your opponent to predict which way the Y-wing will turn. And if they get it wrong, prepare to be shot.....alot


Offence: The TLT is all about reliable damage. Yes each shot can only cause one hit a turn, but when there are four y-wings throwing out eight TLT shots a turn it almost becomes: pick a ship, deal eight damage. Flying a TLT spam list really can make the game easy mode and pilots with low agility ships really can't do much about it. However the TLT has one flaw. It can't fire at range 1. Because of this the counter to TLT is to gun it right at them and hope you didn't take 16+ damage on your way in.

Defence: With this list your opponent really wont have much choice other than to be very agressive. Because of this your greatest defensive tool is your maneuverability. Use those hard 3 turns to keep your opponent guessing. Even splitting your force if necessary. so long as they can stay within range 3 of each other you should be causing damage every single turn.


Y oh Y
So this is the list im going to be flying this week. I really wanted to try out all of the different y-wings in a single list. And if i'm going to use all Y-wings, why not being the master of turrets him self, Kavil.
In this build Kavil has the Autoblaster Turret and Agromech. this allows him to throw out 4 attack dice a turn with a target lock. I also had a point spare so decided to give the BTL-A4 Y-Wing an unhinged astromech, just to make him a little more maneuverable. Looking at this list it seems to have a lot off threats that need to be dealt with, and I think my games will come down to who my opponent decides to try and kill first. Guess we will have to see how it goes Y-wings HO!


Sadly i don't own four Y-wings (yet) so i'll be borrowing a few of of a friend. I'm looking forward to seeing which of the Y-wings proves to be the most useful in tomorrows games. who will be crowned king of the Y-wing.

Next week i should have my grubby little mitts on Wave 8 so expect something new and shiny for next weeks blog. I recently did another poe commission this one complete with BB8. It was tricky to paint
something so tiny, but i think it worked out pretty well. My commissions page is in the sidebar if your interested please take a look. thanks for reading and until next time.


Goodbye and Fly Casual.


Monday 14 March 2016

EPISODE SIX Part2 - CLOSE CALL

Hi everyone. This week Bossk and the Y-Wing bro's got themselves into a few tricky spots. Here's a reminder of what i was flying.


GAME ONE.
In game one, my fleet came across a company of the most elite TIE fighters the Empire could rally.
Howlrunner, Mauler Mithel, Omega Leader, Zeta Leader and a member of black squadron all carrying the deadly crack shot. Bossk drifted forwards trying not to let the TIE's get behind him while the Y-wings moved ahead to block their movements. With an incredible first exchange (and my opponents seven blank evade dice) my force managed to destroy Winged Gundark. The TIE moved forwards and K-turned to shoot the Y-wings while Zeta Leader took a flanking position. one of my y-wings goes down, but Bossk and the other manage to take out Omega Leader. After Taking critical damage, the Remaining y-wing began to run away, hoping Bossk could pick off any pursuers. Bossk manages to take down the black squadron pilot and howl runner before Zeta Leader manages to kill the second Y-wing. It was looking good. I had Bossk with 1 shield and all of its
hull and my opponent only had Zeta leader, who was one hull away from death. Sadly the Yv-666 cannot turn around regardless of how hard it tries. With Zeta Leader being able to stay close behind Bossk and even out predict him putting on the breaks eventually Bossk went down. The Empire wins. With one TIE. On one hull.


GAME TWO.
In game two Bossk came up against something he was very familiar with. A wookie. Chewbacca
aboard the millennium falcon, and accompanied by Leebo aboard the Outrider. My fleet didn't take long picking out Leebo as their primary target. Luckily chewy managed to park the falcon on an asteroid for the first exchange leaving my squad free fire on leebo with little retaliation. Thanks to Bossk's ability four shields and one hull off of the outrider. Next my Y-wings positioned themselves. The first swing in front of Bossk and blocked Leebo. The second blocked off Chewebacca. The falcon blasted into the side of the Yv and Leebo tried to do the same. But it was too late for Leebo. The scums combined fire blew him out of the sky and we even had a ship let to take a shot at the falcon. Next began the game of cat and mouse. The falcon barely managed to get around Bossk and began to fire in his blind spot while out of range of the Y-wings. My squad decided to
regroup. The falcon took the long way around giving me time to get back into formation. Eventually we managed to pin the falcon into a corner. Just as we had him in our sights, chewy managed to take down Bossk with a lucky roll. But the retribution of my Y-wings was swift and the rebels were no more. Victory to the Scum.


GAME THREE.
In game three the falcon returned. This time with Han solo in the driving seat. Along side solo flew a pair of B-wings. Bossk's squad set up in the corner planning to gun it for those B-wings before we had to deal with the falcon. It worked great. The B-wings headed straight for my trap while the falcon took the long way around. Both sides took damage with the b-wing focused on Bossk my Y-wings agromechs made sure the rebels weren't going to be around for long. Everything was going well, but Bossk was facing down an asteroid and I really didn't want those B-wings getting behind him. The Y-wings took the initiative, each in turn placing itself directly in front of Bossk's flight path. Thanks to the Y-wings clever moves Bossk got two more turns of shooting in before he had to deal with the asteroid. We dealt with both of the B-wings. But Bossk had taken some serious damage and now the falcon was right at our flank. the y-wings moved to block Solo's advance,
but even without its ability's the falcon managed to finish off Bossk. Next began the eternal dogfight. The falcon getting into range 3 of my Y-wings while they tried to get into position to chase it down. Once in position, the y-wings shots were hitting hard, but C-3PO and Lando were making sure the falcon didn't take much damage. One Y-wing got dropped to a single hull and we decided to make a break for it. We evaded the falcon long enough for time to be called and the Hired Guns escaped. We tallied up the points. The Rebels win....BY 1 POINT! ....stupid tactical jammer.


THE REVIEW
In the end. i came up against three very different lists and had three very close games. Although Bossk died every game he did manage to deal a lot of damage before he fell. Bossk's ability came in handy alot against the low health TIE fighters as well as Leebo and Chewy who are both all about avoiding Critical effects anyway. The Y-wings were amazing. A lot more maneuverable than i thought and with very reliable attacks thanks to the Agromechs the Hired guns really stole the show for me. I'm glad to see that Twin Laser Turrets really aren't the only option. The list worked very well in general, but i would make a few small changes to Bossk. hear's  what would change about Bossk in this particular list are the following:

Tactical Jammer - though great in concept, the jammer never came into use and actually caused me to lose the last game by one point. It was mostly on the Yv because I had a single point left over. Perhaps maneuvering fins would be a slightly more useful alternative.

Marksmanship - Tho Marksmanship is amazing on Bossk, in this list I found myself using the Y-wings to alter Bossks movement quite often. Because of this i think Marksmanship was only used two or three times throughout the event. Instead, I would suggest predator. That way Bossk can bump to his heart's content and still have some more reliable attack.

Feedback Array - Now you have some points spare from swapping out Marksmanship and loosing the Tactical Jammer, you can give Bossk a feedback array. This is just insurance really. If like in my first game, you end up against a single enemy who you just can't get in your sights, feedback array will allow you to sacrifice a single hull to damage something you otherwise would have no options against. In future, I think the feedback array is going to be an automatic choice on my Bossk builds.


Well thats all folks. The Y-Wings have really peaked my interest, and Kavil has always been one of my favorate scum pilots, so i might explore the y-wing a little more next week. As usual my commissions page is in the sidebar. if your interested in any commissions let me know. Thanks for reading and until next time

Good bye and Fly Casual.


Tuesday 8 March 2016

EPISODE SIX - LIKE A BOSSK

Hi everyone this week we fly one of the most feared bounty hunters in the galaxy. He's mean, he's green, and i hear he has a lovely wookie fur bath robe... ITS BOSSK. Here's what i'm flying.


Hire Gun Y-Wings
Y-Wings in Scum and Villainy seem to be almost solely used to carry around Twin Laser Turrets. An with the Unhinged Astromech making them very maneuverable, you can see why. However, in his list the Y-wings are going to be protecting Bossk's flanks. Because of this the Twin Laser Turret and Unhinged Astro combination would have been useless if the enemy got into range one of the somewhat predictable Yv-666. Instead, i took a look at an astromech iv never used before. The R4 Agromech.
This little guy synergies very well with the blaster turrets.  The y-wings move, Focus. Spend that Focus to fire the blaster turret and the Agromech gives you a target lock for your shots. It's a nice combination and gives each Y-Wing a 360 turret that is throwing out 3 attack dice with a target lock every turn. The weakness of this is if the Y-wings cannot preform their actions, then both the turret and the Astromech are useless so i will have to make sure not to bump into Bossk and focus fire on enemies that can dish out Stress tokens.


Bossk
Big bad Bossk in his Yv-666 is something to behold. As the only Yv pilot who can take an elite pilot talent Bossk can have a lot of very different builds. Making a static "space gun" build like i did with Moralo is viable for Bossk using a mangler cannon and Mercenary co pilot to get those crits in at range 3.

I prefer a more maneuverable build. Focusing on the Mangler Cannon and Marksmanship to get those crits in. Gunner also has nice synergy with Marskmanship as the ability is still making all focus results into crits or hits on the second attack. Though i don't have the points to make a fully optimized Bossk in this list the combination of Marksmanship, Gunner, Mangler Cannon and Bossk's pilot ability should push through some solid damage at any range. With wave 8 on the near horizon, let's take a look at what i would consider the fully optimized build for Bossk.

Bossk in Wave 8
The main thing i'm looking forward to in wave 8 is the crew cards, both Boba Fett and 4-Lom make an appearance on board Bossk's ship in this build. My wave 8 build still focuses on the basic Mangler, Marksmanship Gunner. but has a few extras. Most notable is the Cluster Missiles.
This combination works similar to the build I used on N'dru in last weeks list. With Marksmanship all of your eye results becomes hits and the first becomes a crit. with guidance chips your first blank becomes a crit. After your damage is dealt 4-Lom lets you take one ion token (wich your large ship isn't too bothered about) to select one of your targets focus or evade tokens and make it unusable. This should cause some reliable damage. Then when the crits go through, you can use either Bossk's ability to make them multiple hits or use Boba Fett to eliminate one of your opponents upgrades. this build for Bossk comes in at a pretty expensive 53 points. Not bad for such a bulky ship with incredible firepower. If you think this is a little pricey you could always swap out 4-Lom for "Gonk" and stack some shields up before you begin to blast away.


SYNERGY
In this list Bossk will take centre stage with a Y-Wing on each side. Bossk uses Marksmanship each turn while the Y-wings focus on using their blaster turrets. Bossk's Yv-666 is surprisingly maneuverable, but struggles with turning around so set up towards a corner and swing yourself around the table in a big circle, remembering Bossk still has that 180 firing ark even if he can't use his mangler with it. The Y-wings will cover Bossk if an enemy gets behind him. And Bossk can cover both Y-wings shooting sideways as well as protecting them with his tactical jammer. This list is slow and sum what predictable, but with reliable attacks for every ship and 28 total hull it will be on the table long enough to cause some solid damage.


My opponent's lists really surprised me last week and it will be interesting to see what Bossk comes against. I have my wave 8 all pre ordered and it's only a matter of time now until i have my hands on those delicious scum goodies. If you're interested in having any x-wing miniatures painted my commissions page is in the sidebar. I can paint anything from single ships to entire squadrons and my page has a large gallery of x-wing miniatures so please take a look. Thanks for reading. Until next time.

Goodbye and Fly Casual


Sunday 6 March 2016

EPISODE FIVE Part2 - TIE BREAKER

Hi Everyone. This week my scum cartel faced of against the full might of the empire. Lets take a look at what i was flying.


GAME ONE.
In game one My fleet found itself against dark forces. The emperor himself. Transported inside his lambda shuttle and escorted by Wampa, Omega leader and even Darth Vader himself. This was going to be tricky. N'dru took the right flank. With his barrage of cluster missiles set on Palpatine's shuttle all
he had to do was let the mandalorian mercs distract the TIE's for long enough. Sadly Darth Vader and Omega Leader were onto N'dru's plan and headed straight for him. N'dru just needed to survive one round of shooting, then he could break through towards the lambda. The TIE's fired upon N'dru reducing his shields to nothing, but he got away. Meanwhile the Mercs sent Wampa on a fools errand through an asteroid belt before swinging in and letting those tactician put the pressure onto Vader. N'dru ebbed forward, the lambda almost in range. But Omega Leader was chasing him down. barely in range, with no tokens,  but with a little help from palpatine. 2 Crits. It's ok 3 agility right.....nope. Nothing but blanks and N'dru is down. However the Mandalorians finished off Wampa and have Vader under control. Despite Lord Vaders panic attack, he still proved to be a very evasive pilot. Many more exchanges of laser fire later the Mercs finally managed to down Vader's TIE Advanced and then time was up. My Firespray jump into hyperspace. Leaving Omega Leader alone to escort Palpatine's Shuttle home. Victory to the Empire (but only by 11 points)


GAME TWO.
In game two we happened across a small rebel insurgency team Luke Skywalker with a Rookie pilot wing man, Supported by Ten Numb. Knowing Ten Numb's Mangler cannon would tear threw N'dru no problem we had to take this one easy. The asteroids were set up in a perfect jousting lane so the Mercs faced down Ten Numb and the Rookie pilot while N'dru took the flank and aimed for Skywalker. Both forces slowly inched forwards for a while, neither daring to get into range.
Until my force took the initiative and surged forwards. N'dru's clusters locked onto Luke. The X-wing fired upon N'dru but lone wolf and Glitterstims made sure he was safe. The missiles fired. A few good evades but the missiles were too strong. One dead Skywalker. You don't have to worry about R2-D2 regenerating shields when he's one turn killed. Ten Numb and his x-wing companion began to shred shields off of my firespray but Ten numb was no match for the Mercenaries head on. Only the Rookie X-wing remained who clearly had something to prove. Rolling nothing but evades it took me four more rounds to take him down, but eventually he was gone. Victory to the Scum.


GAME THREE.
In game three my force faced off against a TIE swarm. Two Tie Fo, One TIE Advanced, One classic academy pilot, Winged Gundark and Youngster. The enemy flew in tight formation with Youngster dishing out his Expose ability. Youngster had to die, and fast. Ndru took a flank once again while the Firespray planned to lure the swarm in among the asteroids. Smarter than I thought, the swarm headed strait for N'dru. The Merc's swung in to help but got a little too close. N'dru locked onto youngster. Sadly, his cluster missiles did zero damage rolling only two hits and Youngster rolling good evades.

N'dru didn't get long too contemplate his failure tho, as he was decimated by several TIEs moments later.
It was down to the Firespray. They focused on trying to kill one TIE a turn but there just wasn't enough shots to deal with their numbers. The Mercs killed a TIE Fo while the swarm was focused on N'dru. And then it became bump city central. The Mercenaries edged around the swarm while the imperials broke formation in attempts to get around the Firespray. Using those rear firing arks the Firespray hailed the TIE Advanced with lasers, but only scored a few glancing blows. Luckily the Swarm was scattered. Each turn the Firespray tried to focus on killing a ship, but just couldn't quite make it. All the while the TIE regrouped and picked away at the Mercenaries. It wasn't until time was called that I finally managed to finish off the TIE advanced and Winged Gundark. But it was too late. Victory to the Imperials (By 8 points!)


THE REVIEW
As you can see two of my games were very close. If my opponents hadn't got half points for one of my Firespray being at 50% health then I would have won both of those games. But I guess those changes were made for a reason. The list seemed to work well, but i'm not sure I got the best examples of it, against two lists with lots of ships. I think this list would do a lot better against two ship builds or aces. The Firespray can stack stress onto any ace such as vader, poe and soontir while N'dru can either cripple a large ship or outright kill most aces. I think N'dru got unlucky in the first game, dying to Omega Leader and in the third it was my own fault for having the Mandalorian Merc's too close for his ability to activate. I don't think there's anything I would change about this list other than adding Guidance Chips to N'dru allowing his clusters to be more reliable. Despite mixed results, i really enjoyed flying this list and seeing N'dru do his thing and one shot Luke's X-wing was really nice. This build for N'dru makes up one third of my new tournament list so he will return on this blog sometime soon.


Over halfway through the league now, and wave 8 is coming two weeks from now. Meaning i should have what i need to show you my tournament list for the finale (fingers crossed). As always my commissions page is in the sidebar. Thank you for reading. Until next time.

Goodbye and Fly Casual


Tuesday 1 March 2016

EPISODE FIVE - N'dru and Company

Hi everyone this week we fly my favourite character in the scum faction N'dru Suhlak and looks like he brought some friends. Let's take a look at the list.


N'dru Suhlak

N'dru my boy. I've been avoiding using him in my lists for the league as i was waiting for wave 8 to release so i can give him some guidance chips. Since it looks like wave 8 is still a few weeks away, i felt like saying sod it and brought my favourite little scoundrel anyway. Fully upgraded N'dru comes in at a very cheap 25 points with an incredible alpha strike ability. N'dru's job is to line up his cluster missile then wreck any ship in his sights. Lets take a look at how he does this. First his pilot ability gives you one additional attack die if there are no friendly ships at range 1-2. This effects each of the two cluster missile shots, allowing him to throw out 8 attack dice in a turn. The problem with cluster missiles is they have great potential damage, but very little reliability after you spend your target lock to fire them. This is where Glitter Stim comes in. You swoop in, target lock the thing you want to die then activate your
glitterstims. now you have 8 attack dice and all focus results become hits. Of course you're still likely to roll a blank or two. And that's where lone wolf comes in. Already wanting to be off on his own N'dru benefits hugely from Lone wolf.  The first missed shot from each cluster missile can be re-rolled and if it becomes anything but another blank its a hit from the stims. The final piece of the puzzle (sadly missing here) is guidance chips. The chips allow you to turn a blank result into a hit when firing missiles. So 8 attack dice. All focus results become hits. Blank results can be re-rolled and one can become a hit for free. N'dru is a monster. I've managed to kill the millennium falcon in two turns with N'dru and a pare of Kihraxz before. He is a little tricky to fly as he is always off on his own, so has no one covering his back most of the time. And at a respectable, but not amazing Pilot Skill 7 N'dru can take a lot of fire from aces before he can get hit missiles flying. This isn't too bad though with Lonewolf and Glitterstims he has 2 defence dice re-rolling one blank per attack and all focus results become evades. And once his payload as been delivered he can fly around on his own essentially becoming an X-wing with lone wolf. Not bad for 25 points ey.


Mandalorian Mercenary
Flying along side N'dru (but keeping their distance) are a pair of Firespray. The firespray are probably my favourite ship in all of x-wing. In the tournaments I've been to I've always brought three basic firespray and they are always amazing. With one of the best dials the Firespray can be very unpredictable and tho its green maneuvers are limiting its only red moves are its k-turns. With 10 total hull and 2 agility the firespray can be tricky to deal with, not to mention that it's one of the only large ships with the Evade action.
Offensively the Firespray has a solid 3 attack, but its main strength comes from its auxiliary rear firing arc. This becomes great when jousting as you can simply overshoot your opponents ships and blast them from behind without needing to worry about getting stressed. In this list both of my Mandolorian Mercs are carrying a Tactician. The tactician is always a great crew, but on a firespray almost becomes twice as useful as it can still give out stress from that rear ark. This is one of the advantages an auxiliary firing ark has over a 360 firing ark as well as the fact that Autothrusters don't activate in auxiliary ark. I also gave one of the mercs Crackshot. the basic mandalorian merc having Pilot Skill 5 and an elite pilot talent allows you to really build them in a lot of different ways. Veteran instinct gives you a solid Ps7 for 1 point. Crackshot can push damage through to evasive targets and you could even use Push the limits and a cannon to make a slow moving death turret. The firespray really is the poster boy of scum and villainy and rightly deserved. I have never regretted bringing a Firespray.


SYNERGY
with this list the plan is to set up the two firespray towards one of the table edges and N'dru towards the other. The firespray can take it easy trying to get into range 2 instead of zooming on in. once they have stacked some stress on the target N'dru can come on in and unleash his cluster missiles. The Tacticians will make my opponents moves more predictable and N'dru can cause that big hit. Once N'dru's target is taken out the Firespray should be able to Mop up what's left. Tacticians to your firespray its time to roll out.


I've heard people saying that Wave 8 is due to be released on the 17th of march so only two weeks away. If the rumors are true. I will hopefully be able to get a chance to talk about some of the new lists before the league is over. I really think wave 8 will make the scum faction complete. Largely because of the abundance of new crew cards. We will see. Hopefully sooner Than later. Either way i will try and do a Wave 8 special so i can talk about the new cards and some of the ways they can be used.
Thanks for reading. As always my commissions page is in the sidebar. Until next time

Goodbye and Fly Casual.